Design Project
1 Assembly
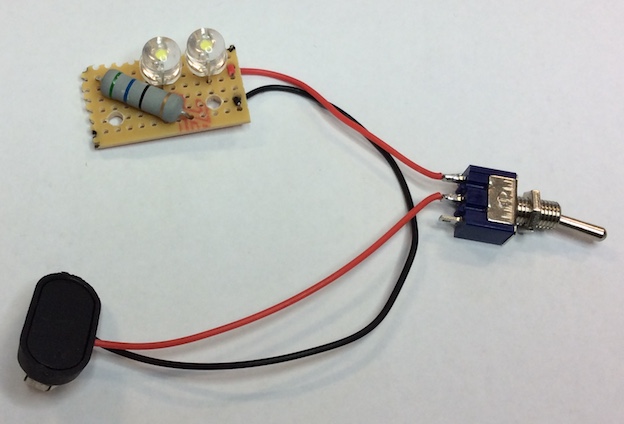
Switch it
- With all your component parts, you can now assemble your finished product. Because of all your hard work, this will be a quick process.
- The power switch needs to be wired up as per the image above. Cut the red wire on the PP3 battery cable about half-way along, and wire strip the two ends of the cut and solder them to the switch as seen in the image.
- Use PVA glue to stick MDF parts of your housing together.
- Don't stick the lid down if you're going for an internal battery, otherwise you'll never be able to change it!
- PVA glue takes 24 hours to form a full-strength bond, but the body of your lamp should be fine to handle after about an hour.
- To avoid scratching your furniture at home, use the countersink tool on the bottom of your base before putting M3x20 countersunk machine screws in.
- Use 5mm spacers on top of the machine screws, then finally place your PCB on top and secure it into place gently with a pair of M3 nuts.


Mount It
- You can then remove the nut from the front of the switch, pass it through the 6mm hole you've made and put the nut back on to hole the switch in place. Tighten it gently with pliers while holding the back of the switch.


Badge It
- Take a photo of your finished product, and upload it.
- Silver: Assemble some aspects of product, but not finish.
- Gold: Produce a working LED lamp.
- Platinum: Free from excess glue, neat countersinks, good quality finish.