| Task 1 | Task 2 | Task 3 | Task 4 | Task 5 | Task 6 | Task 7 | Homework Tasks |
Design Project
1. Contextual Challenge (the problem that needs solving)
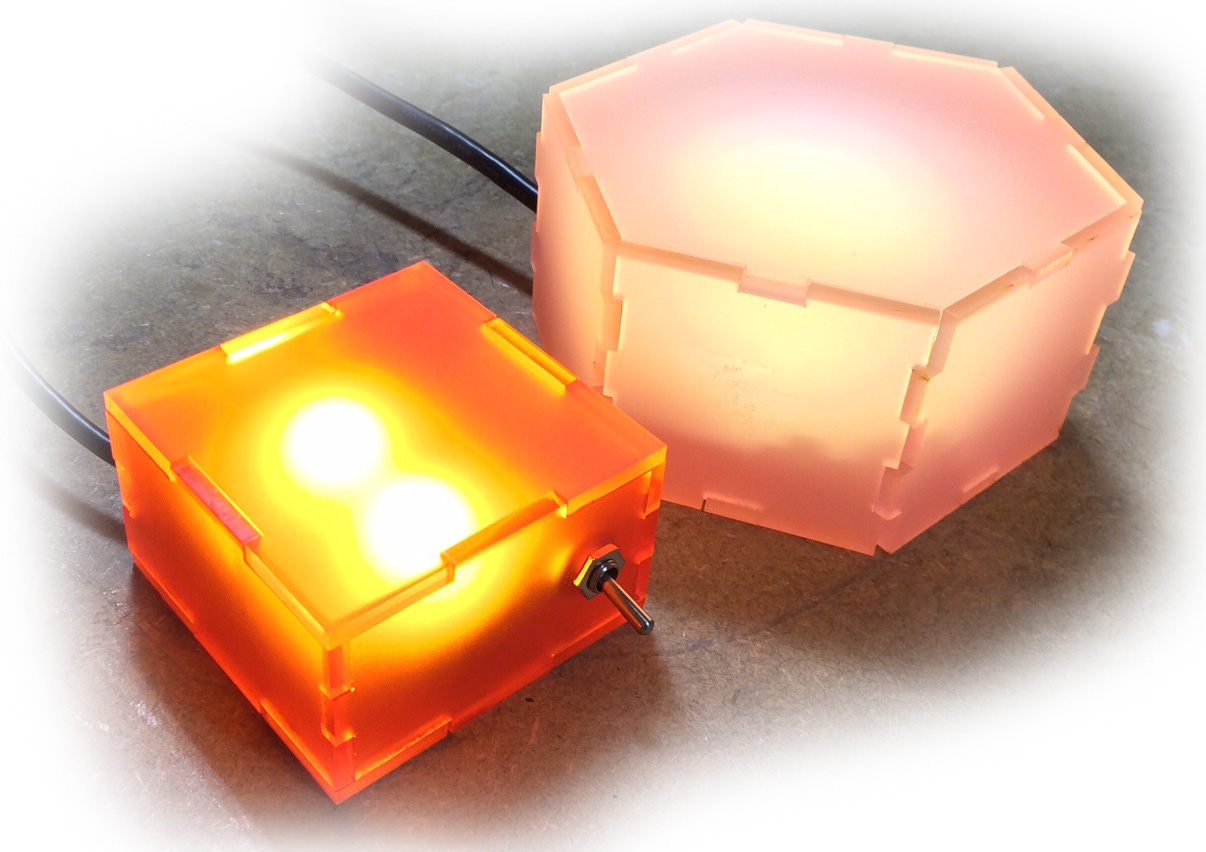
Children are often scared of the dark and struggle to sleep at night time. You will design and make a night light system that will produce a low level light that will not be too bright as to keep the child awake, but bright enough to ease their fears of the dark.
1. Specification (the list of criteria than needs to be completed to solve the problem)
Must |
Should |
Could |
| Use a stripboard as the PCB. | The housing should be unique to suit the environment it will be placed in. | Be made from Plywood, PLA (3D printed) or Acrylic |
| Use 2 super bright LEDs, to provide low level lighting. | Be able to replace the 9V battery easily | Be painted or personalised |
| Use a 9V battery to save space. | ||
| Be able to be turn on and off manually to save battery power. | ||
| Must not exceed 70X70X120mm | ||
Learn It
- In this project, you will design and create your own high-power LED light.
- Everything will be completely original, designed by you.
- You will need to combine your SolidWorks skills, circuit design, soldering and making abilities to produce a product which will potentially last for many years to come.
Learn It
- Go online and research different types of night lights, this will help to inspire you with your own design ideas.
- Have a look at some of the different design movements for example the Bauhaus movement and the Art Nouveau movement.
- Want to make some really exotic? Click here
- This may help in your design ideas.
Try It
- Can you identify one reason why each of the lighting technologies names above was an improvement on its predecessor?
2. Client needs
For this project we are going to be making our lamp for a client. The client can be anybody you know including yourself. We are going to use a process called User-centred design (UCD). In this process the designers (us) focus on the users and their needs. To establish their needs we are going to need to ask them and record their answers.
Here are some needs to get you started:
- Needs to be easy to switch on
- Needs to be small enough to fit on a side table
- Needs to be able to change the batteries easily
- Needs to provide enough/not too much light
Make a list of three or more needs of your client. (colour, shape, theme, style etc.)
3. Design Specification
Learn It
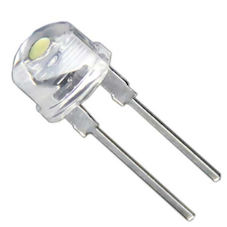
- Your light will use 2x 1W LEDs (shown above magnified - they're about 5mm X 10mm x 10mm)
- The housing could be made from a combination of laser-cut 3mm Plywood and 3mm translucent acrylic or on their own or 3D printed.
- To emphasise the compact nature of LED lighting, your unit should be as small as possible.
- It's dimensions must not exceed 120mm X 70mm X 70mm (H x W x D)
- The circuit must be built on Stripboard.
- It should run from a 9V battery, and include a switch to turn the power on and off.
Badge It
- Sketch three different ideas for the design of your housing, this approach of developing multiple ideas, prevents design fixation. You can always make changes later, so don't fixate on details. This is about articulating your ideas!
- To complete the badges you will need to click on the link at the bottom and complete the quiz. This will automatically badge your work.
- You will also need to upload photos of your actual drawings to the silver badge as evidence of your work.
- You will need to be logged into www.bournetolearn.com to complete the badge.
- Click on this link design quiz
- Silver: Three different designs drawn.
- Gold: Includes an indication of dimensions.
- Platinum: Includes colour/type of materials and specifies techniques (e.g. finger joints, type of glue) for making.
- Once you have completed your design ideas open a word/text document to record the following discussion:
- Discuss all 3 of your design ideas with the person next to you. Ask them what they like and don't like about each of your designs, how they would improve on each of the design ideas.
- After the feedback is received, you will need to choose an idea and then explain why you would prefer this idea.
- This is known as 'Stakeholder Feedback'.