| Week 1 | Week 2 | Week 3 | Week 4 | Week 5 | Week 6 | Week 7 | Additional SolidWorks help | BBL tasks | Assessment guidance |
A Project Storage Box
1 Designing your own lid for the laser cutter
Try It
- Search for the images you want for your box.
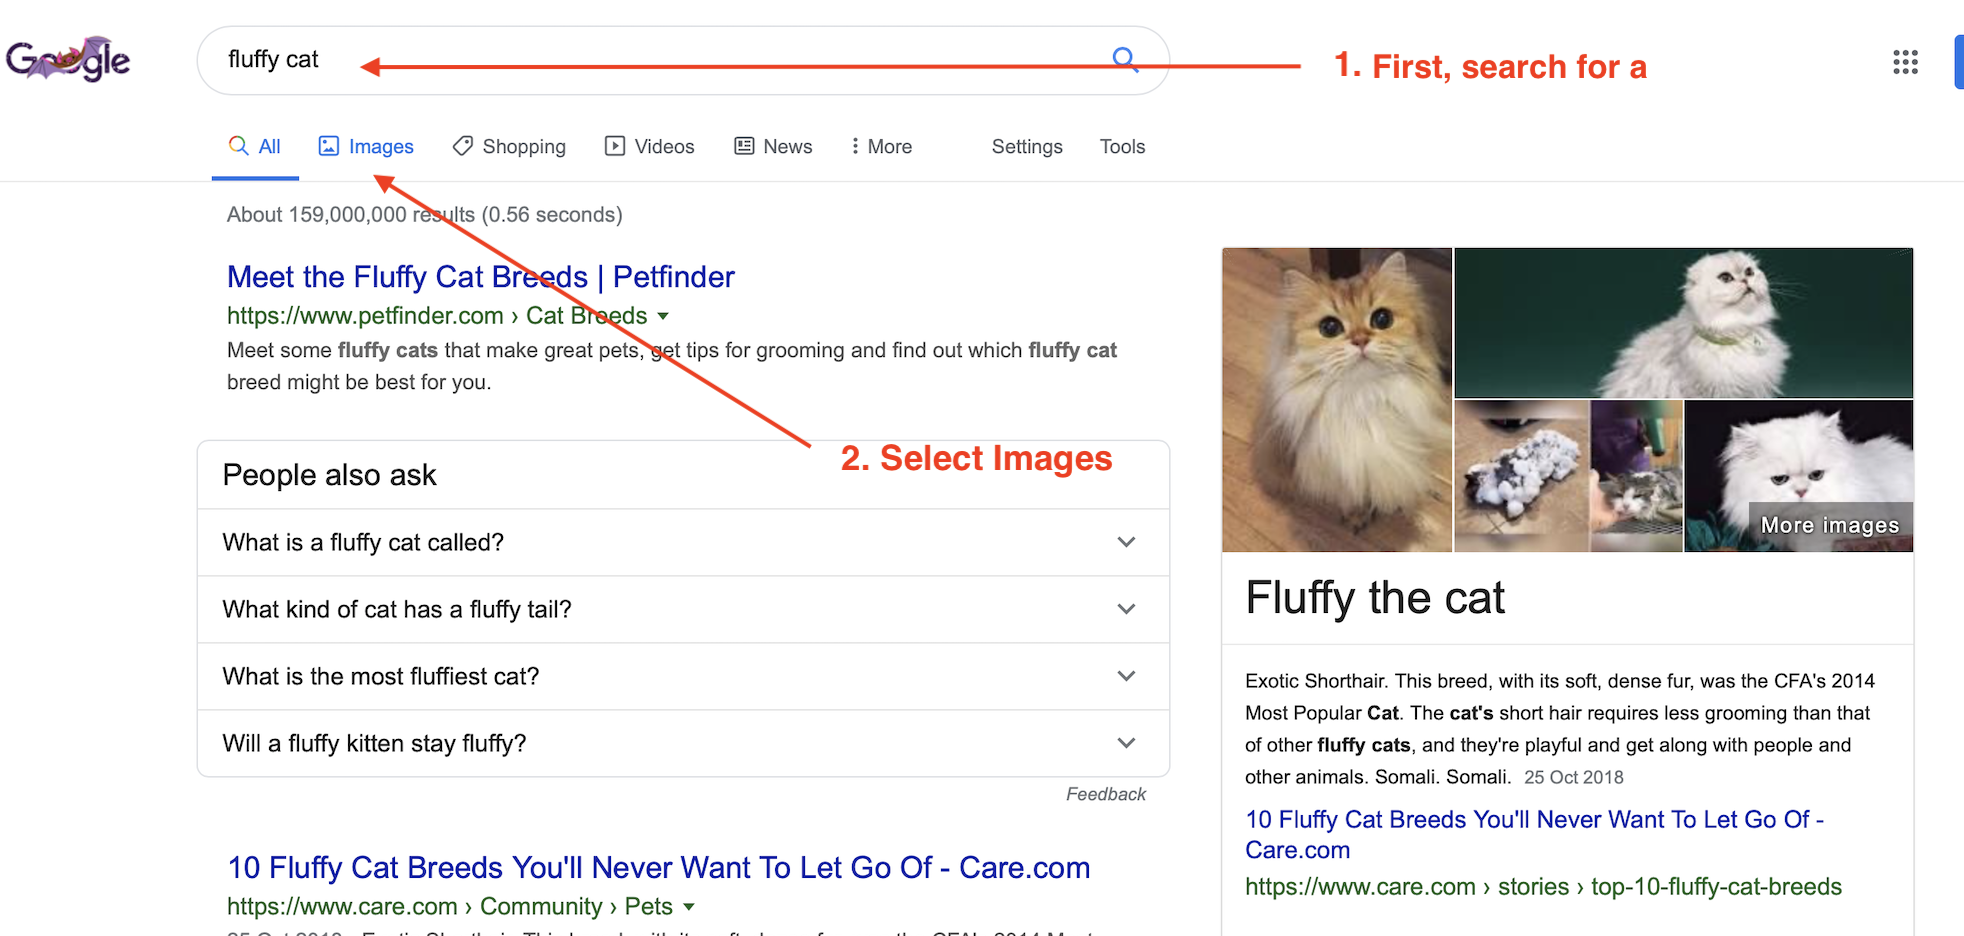
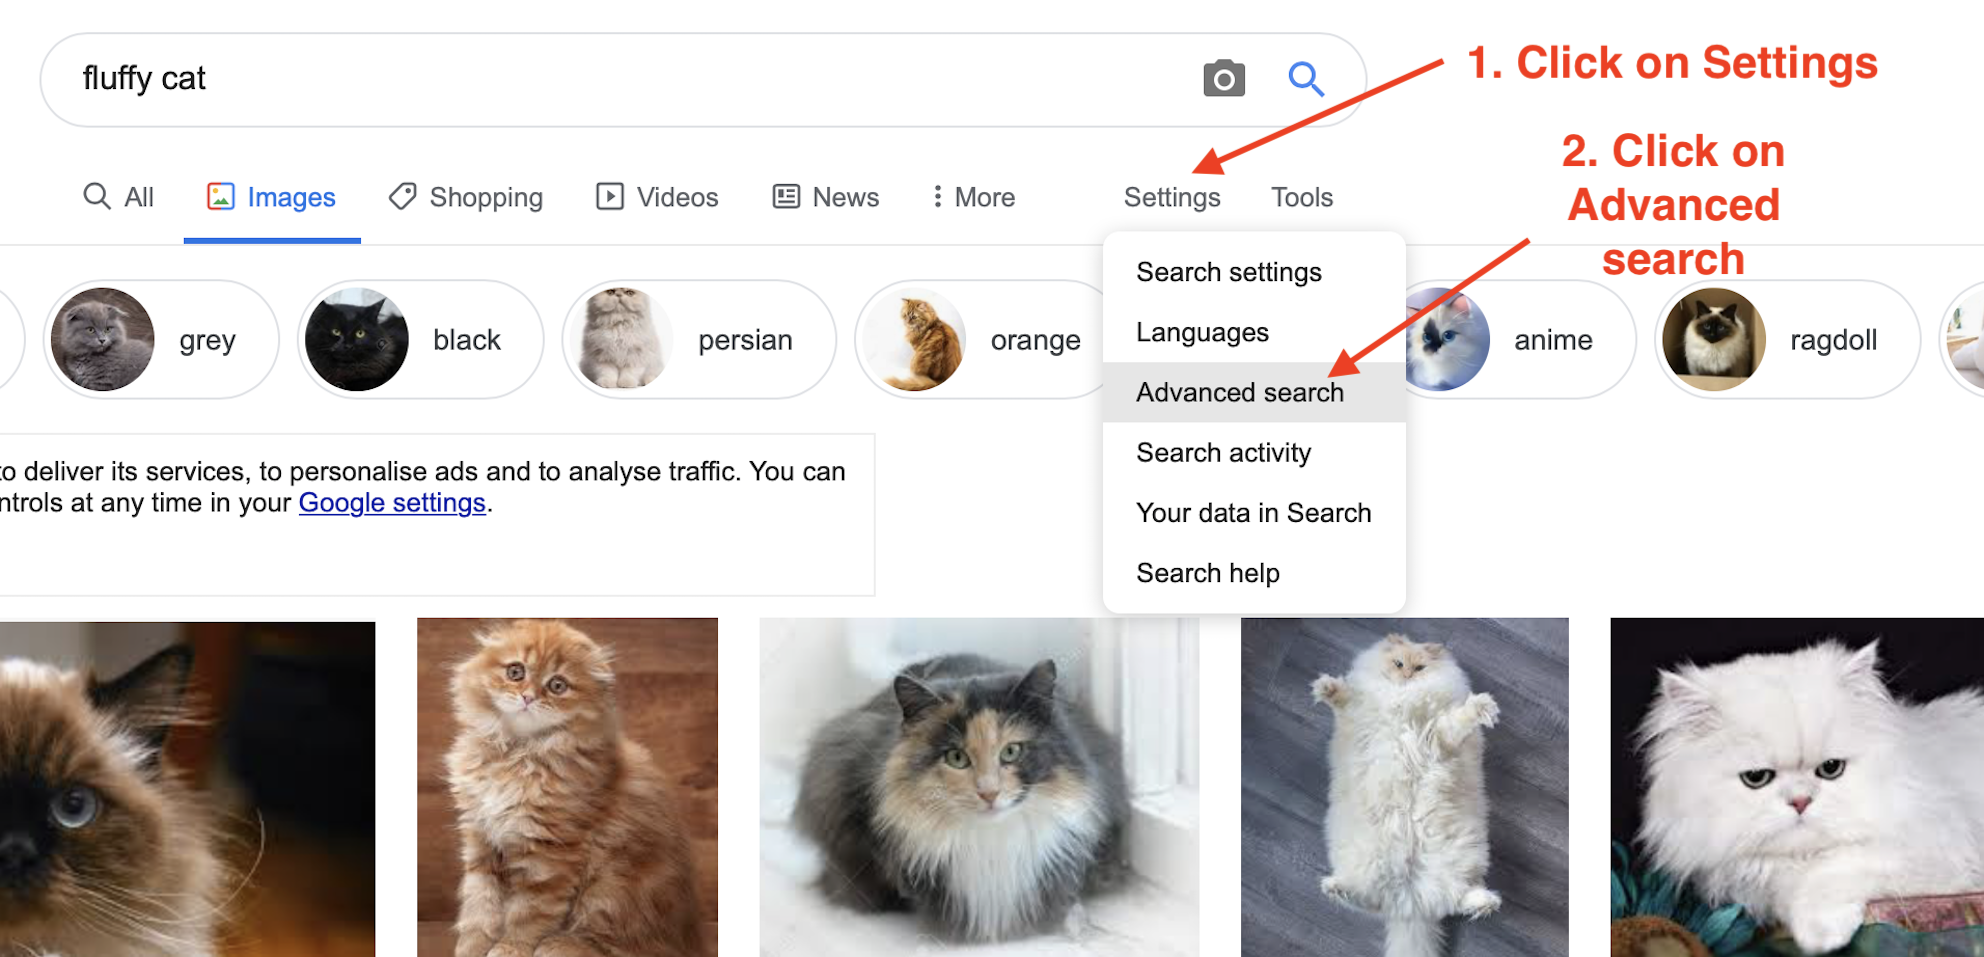
- You will need to select images and then go to settings and select advanced search.
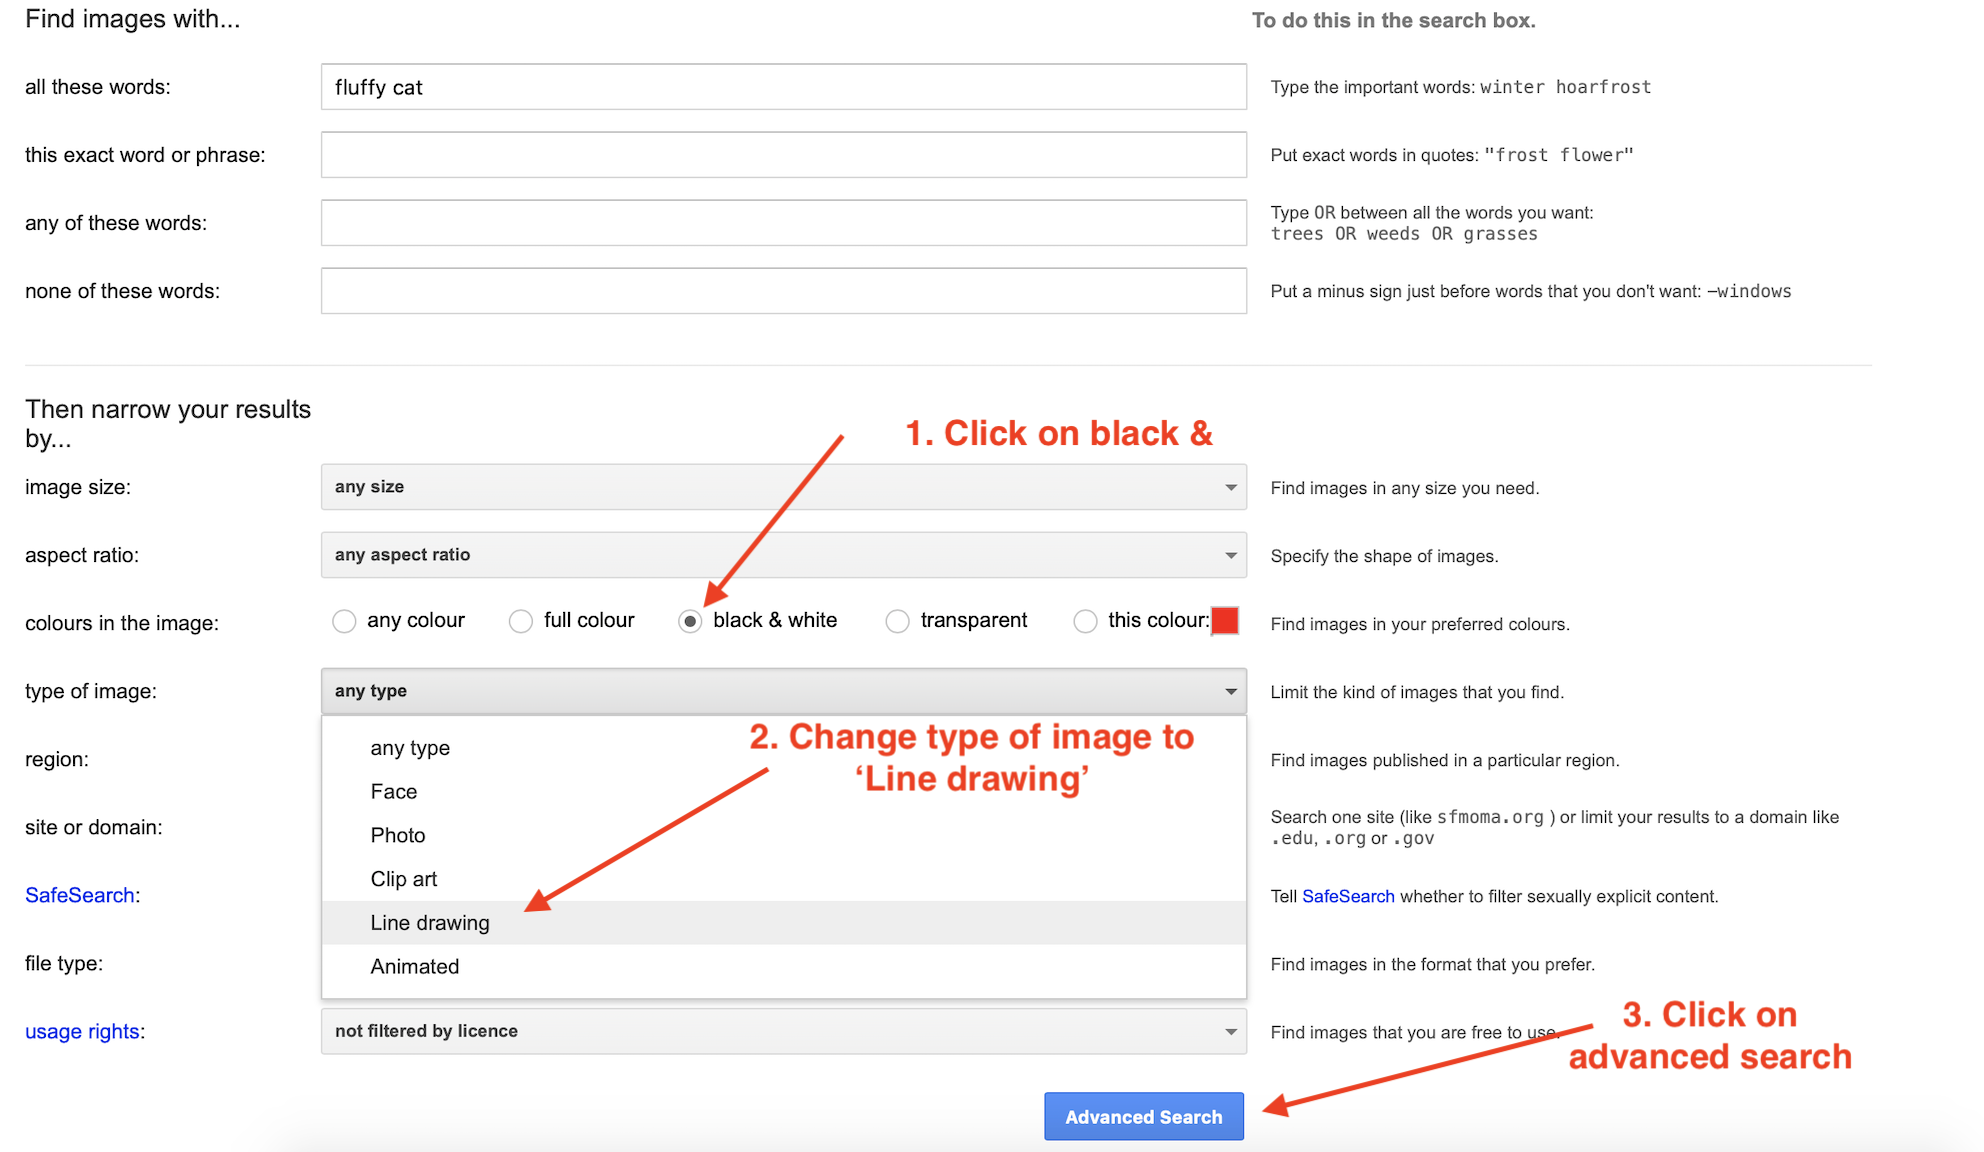
- Change the options to 'Black & white' and the change it to line drawings. Now click advanced search.
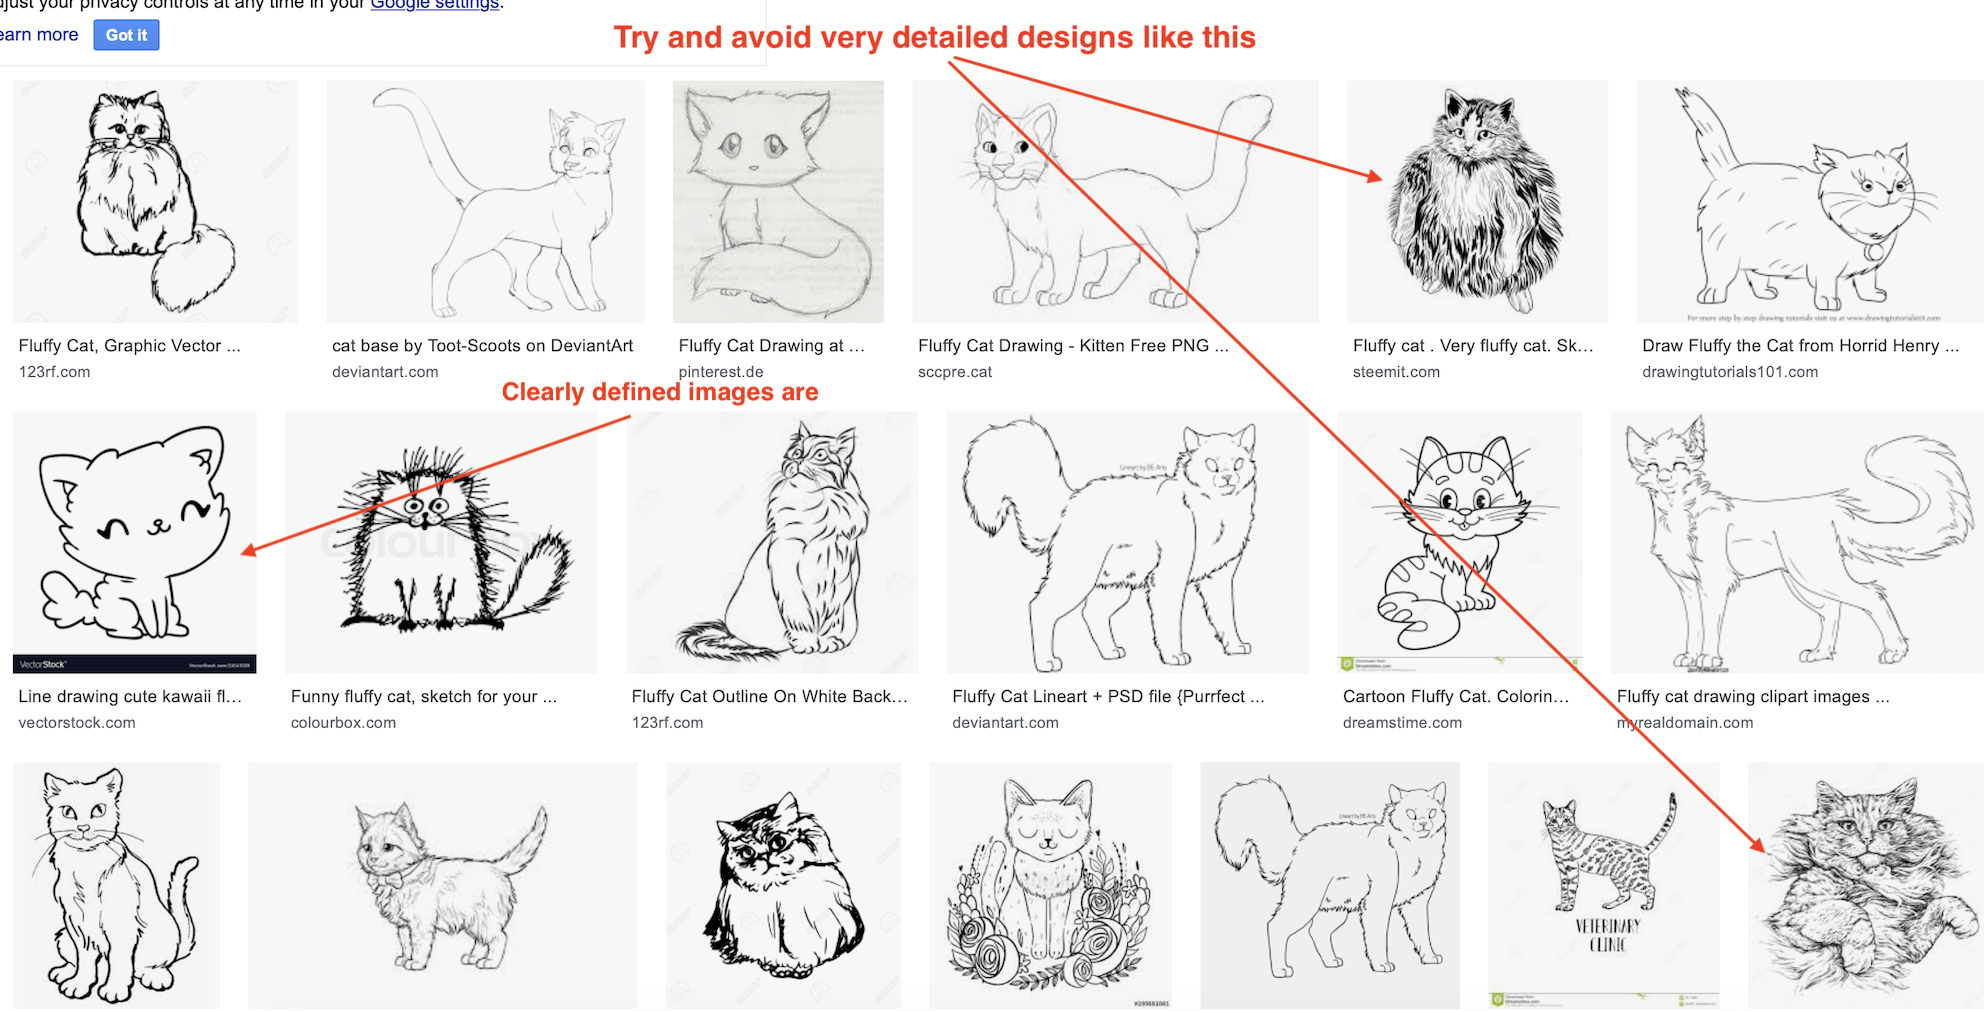
- Try to avoid images with too much detail.
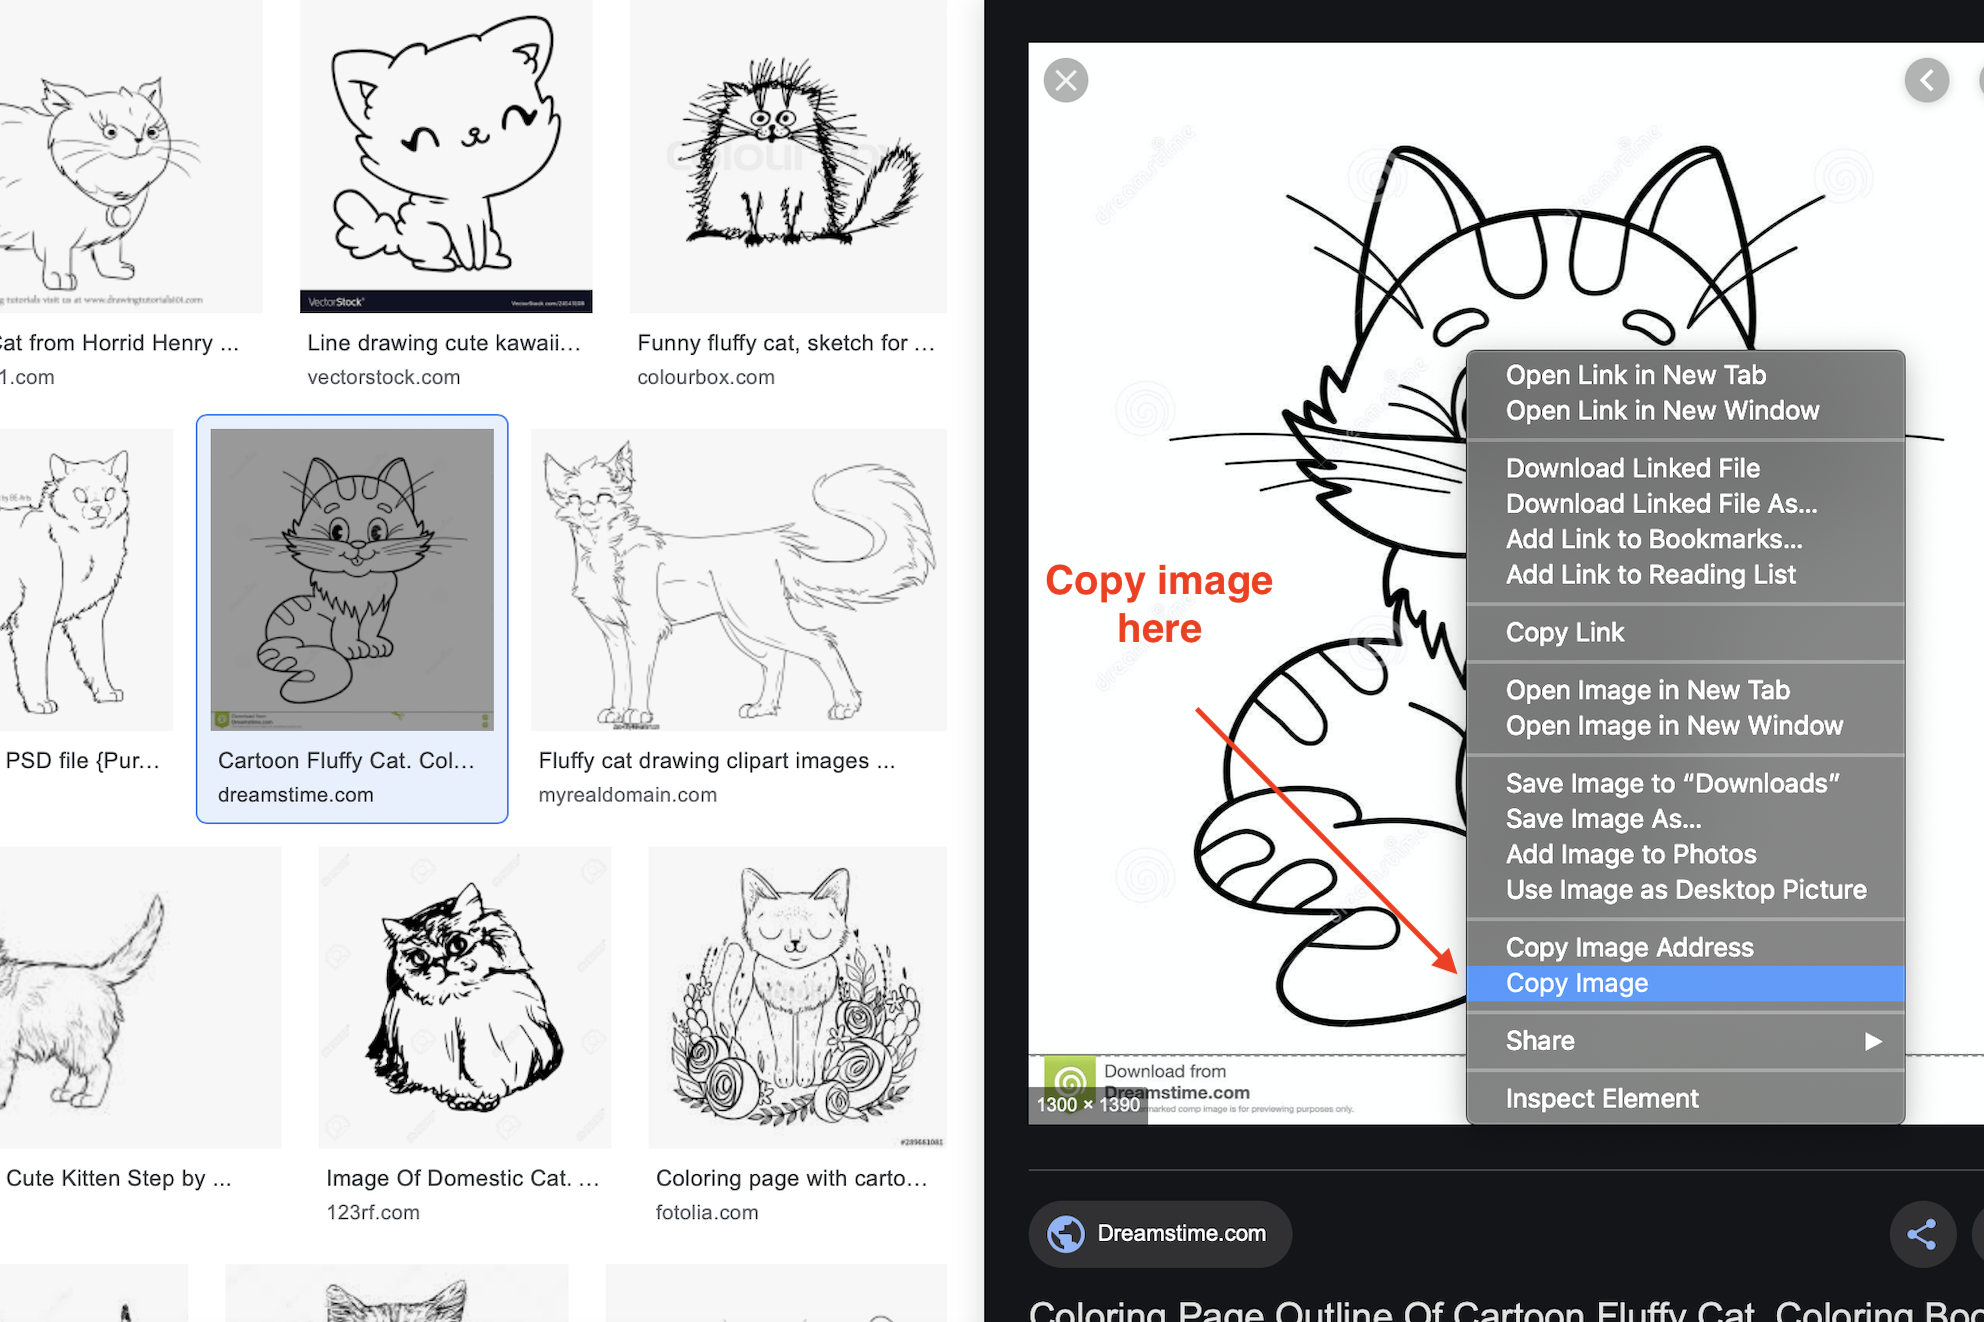
- Copy the image you wish to use.
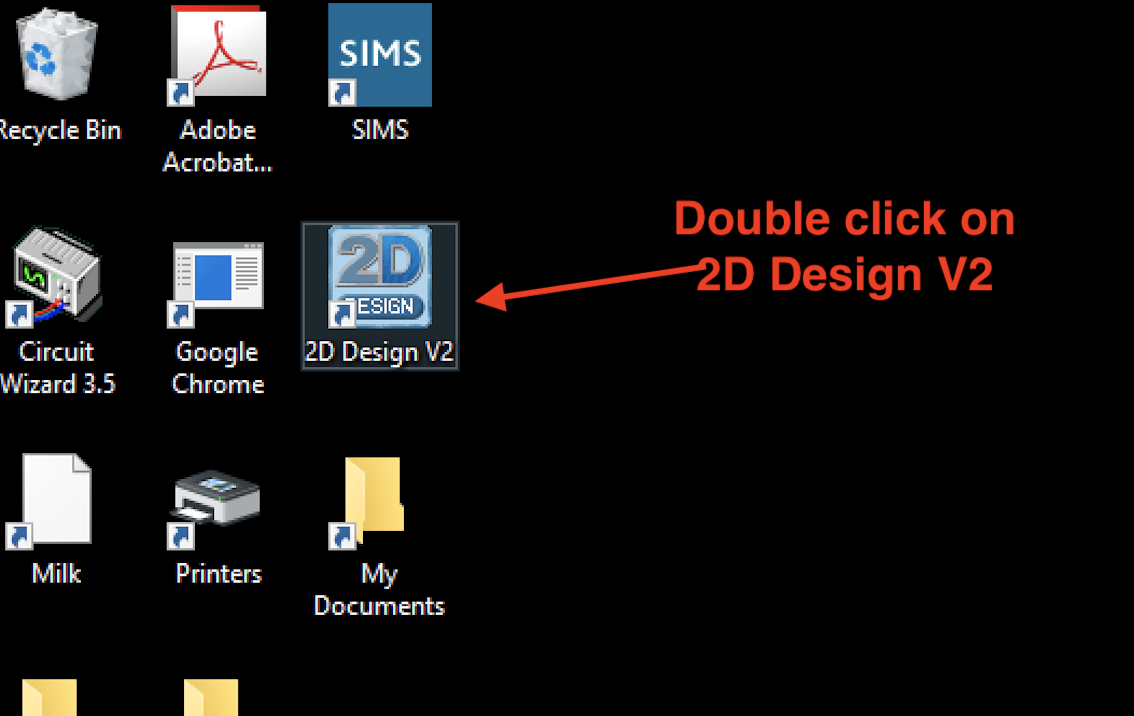
- Now go to your desktop and open 2D designs.
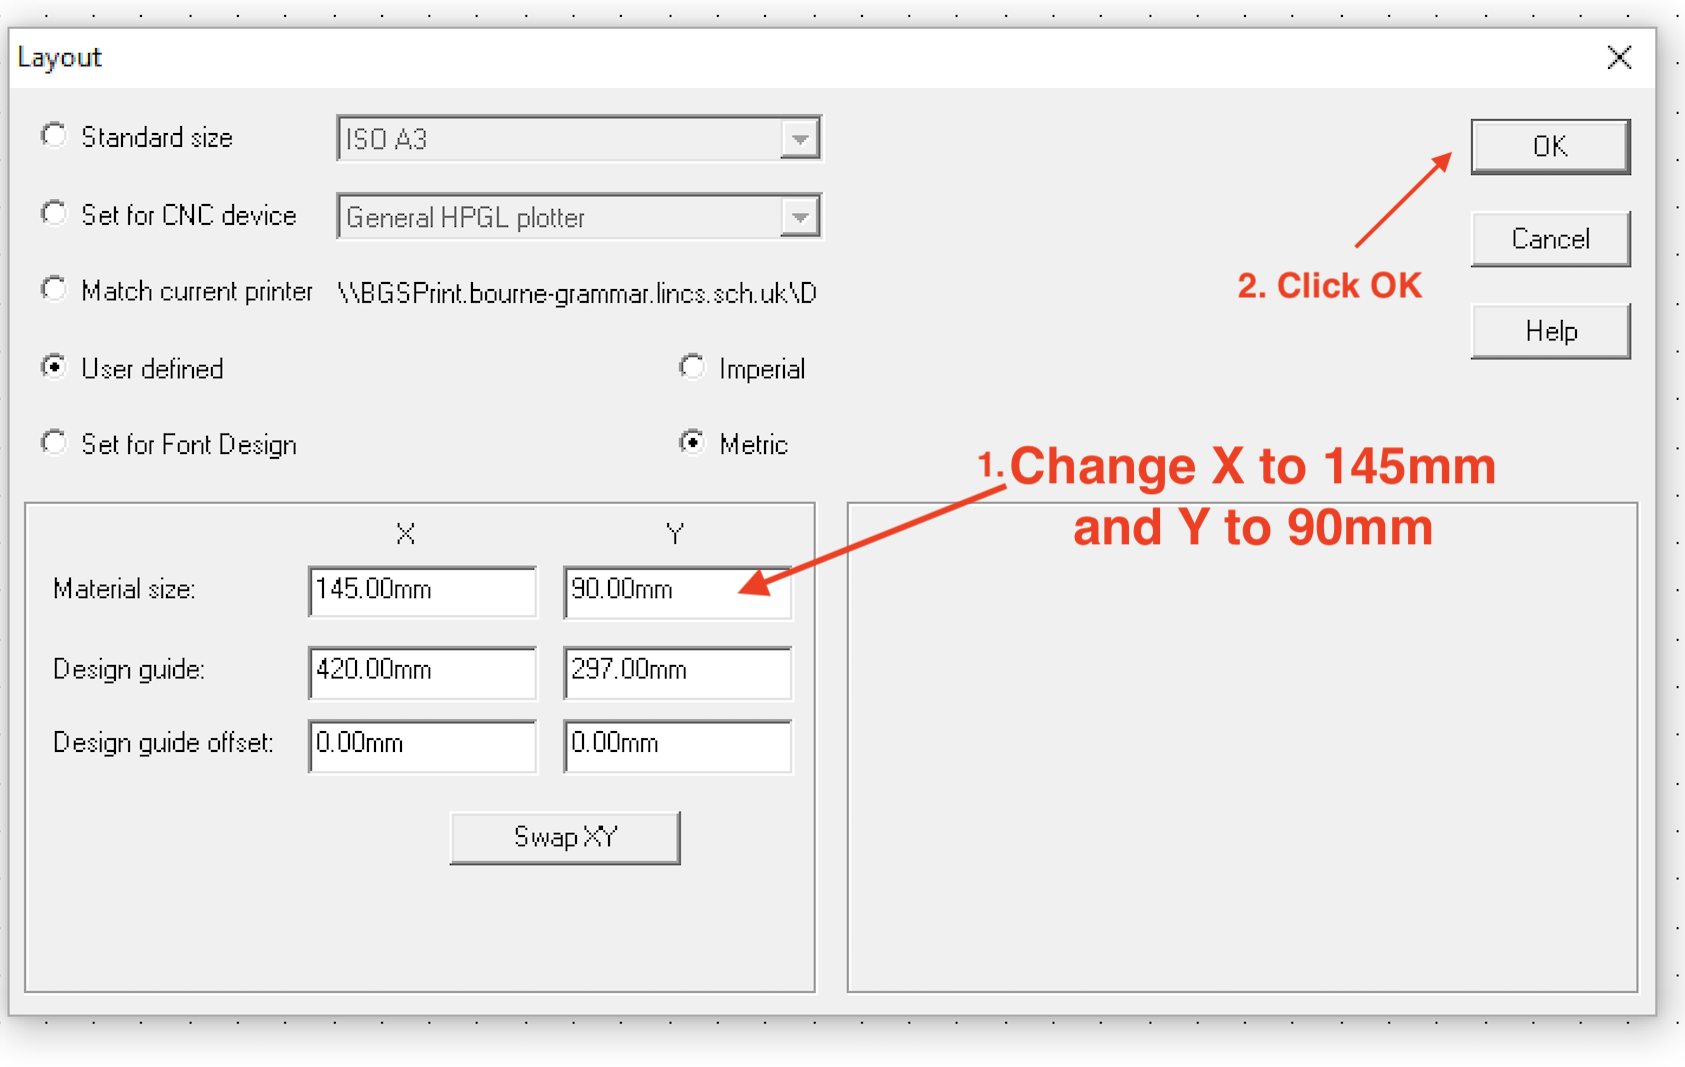
- You will now need to setup the page size.
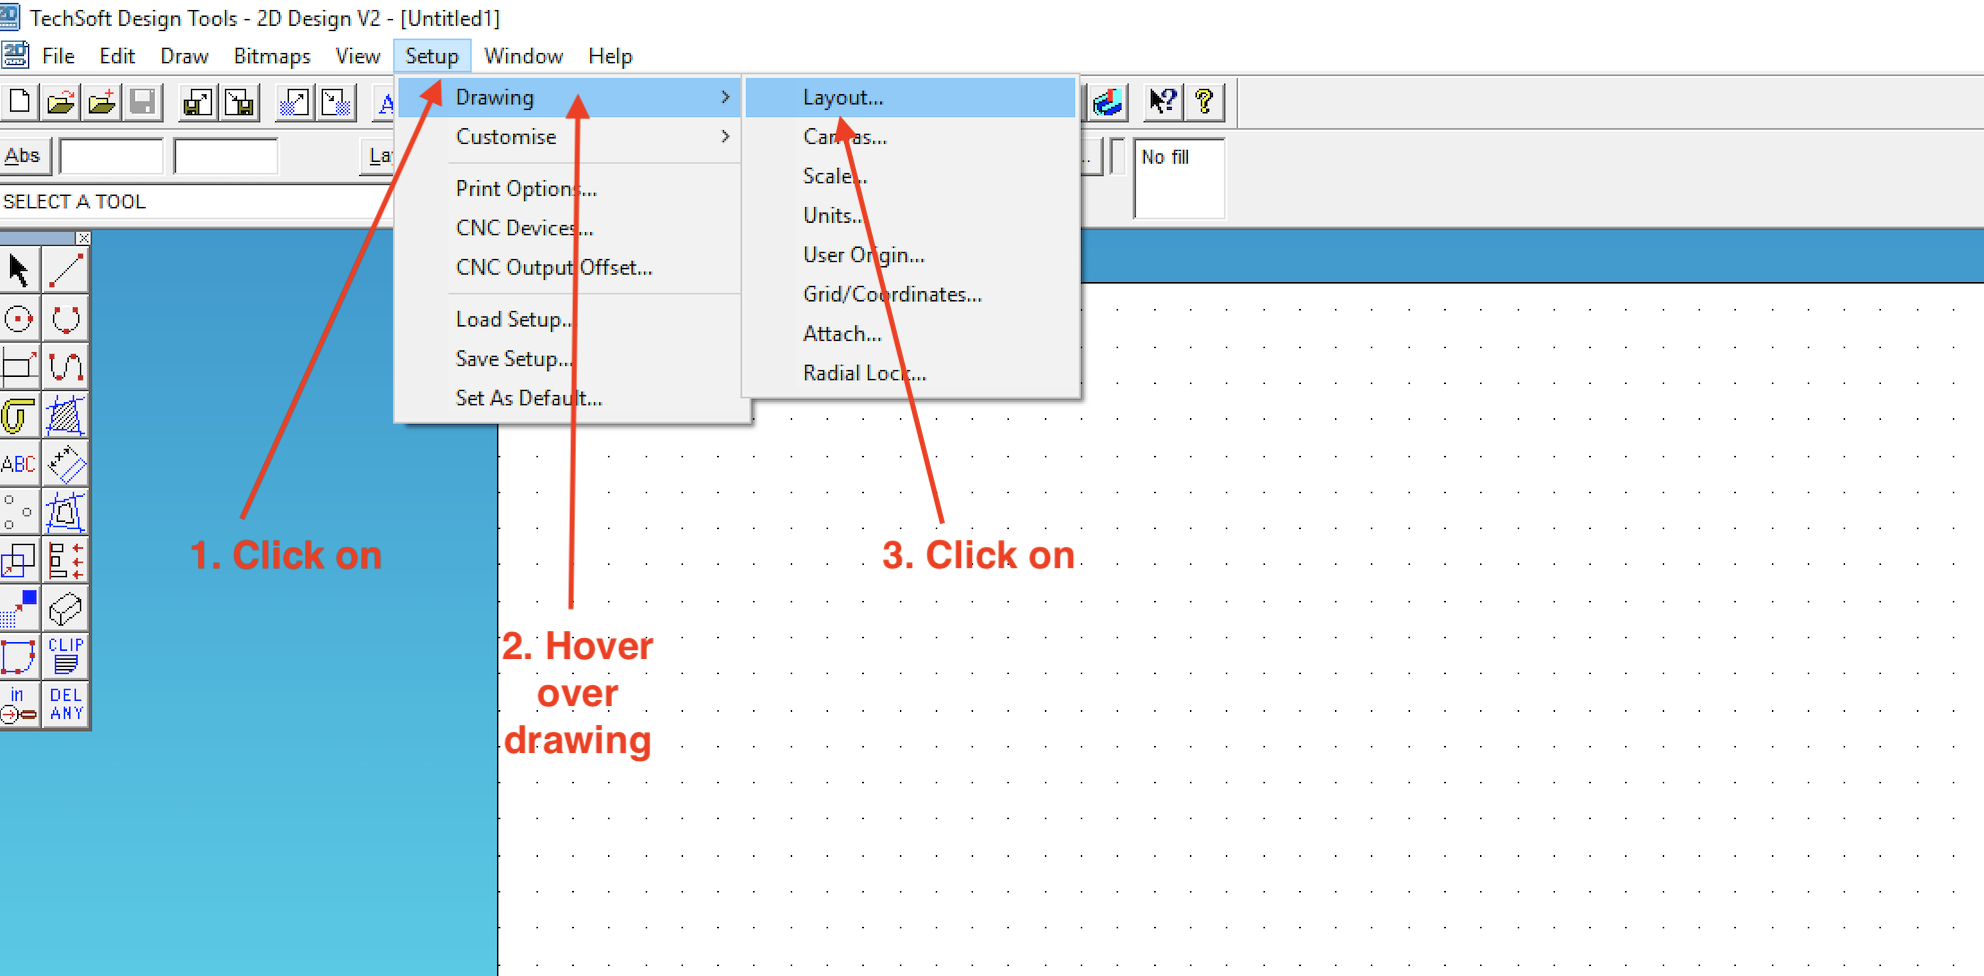
- Select user defined.
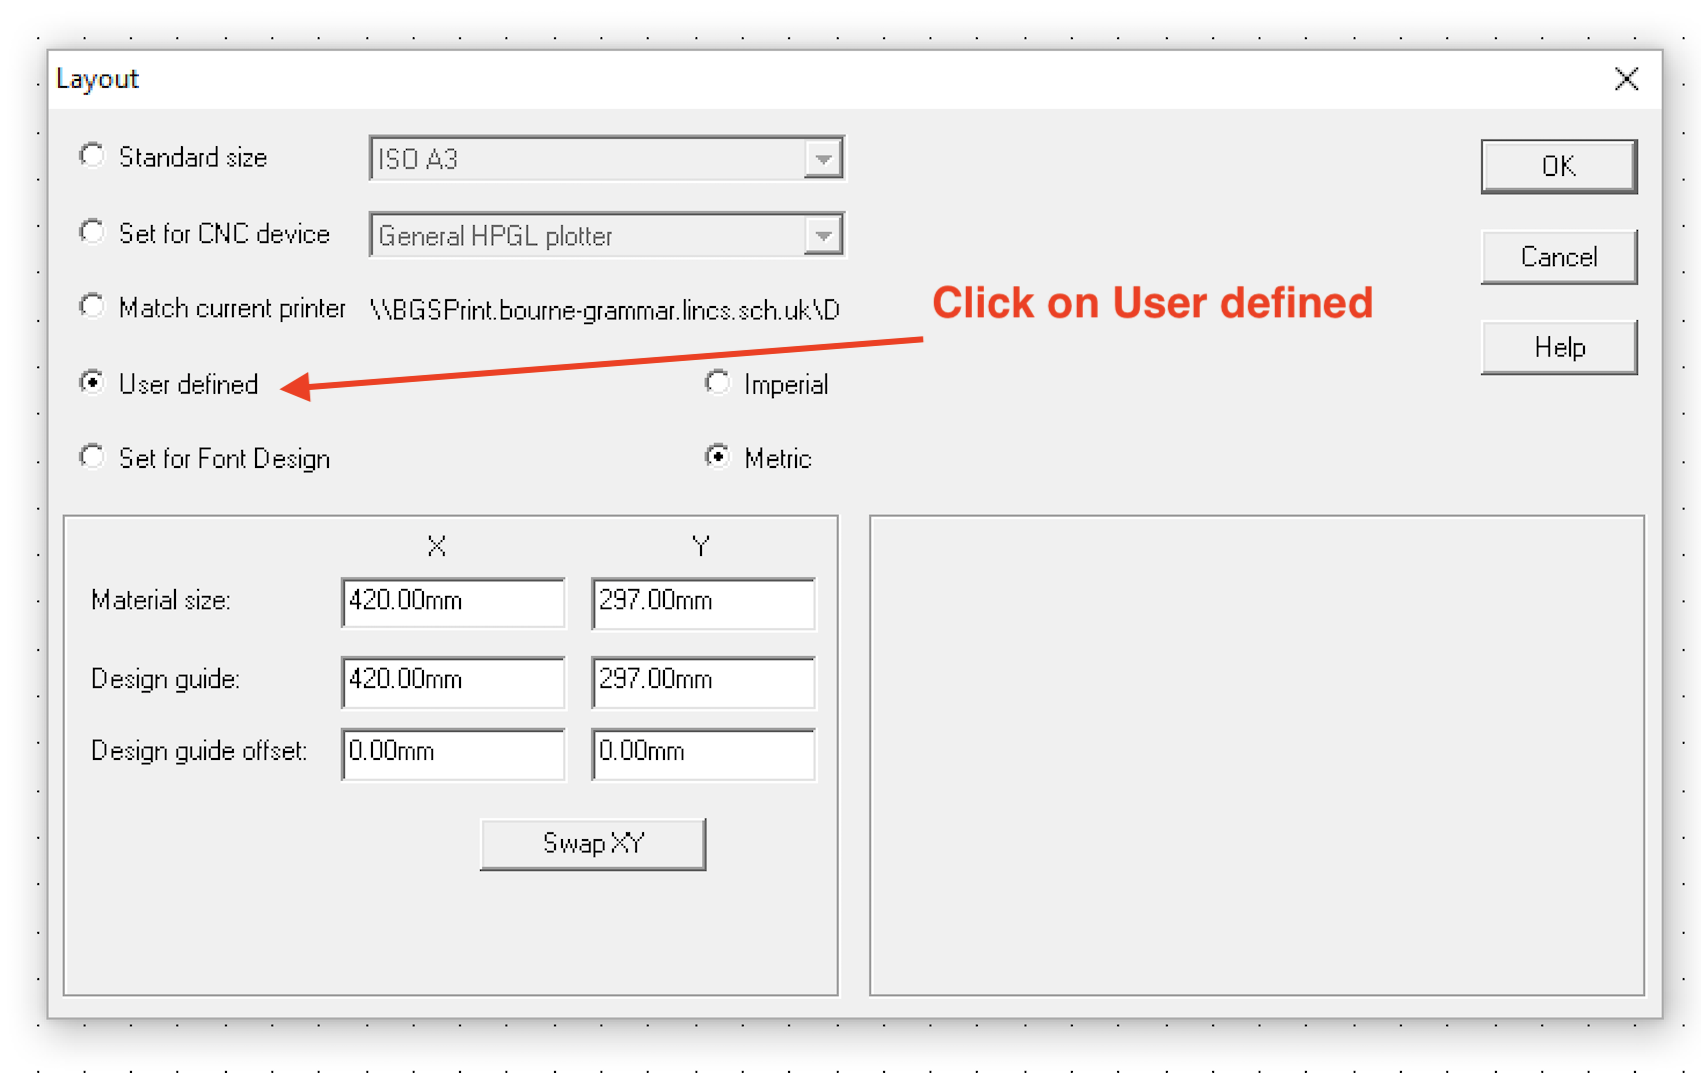
- Change X to 145mm and Y to 90mm.
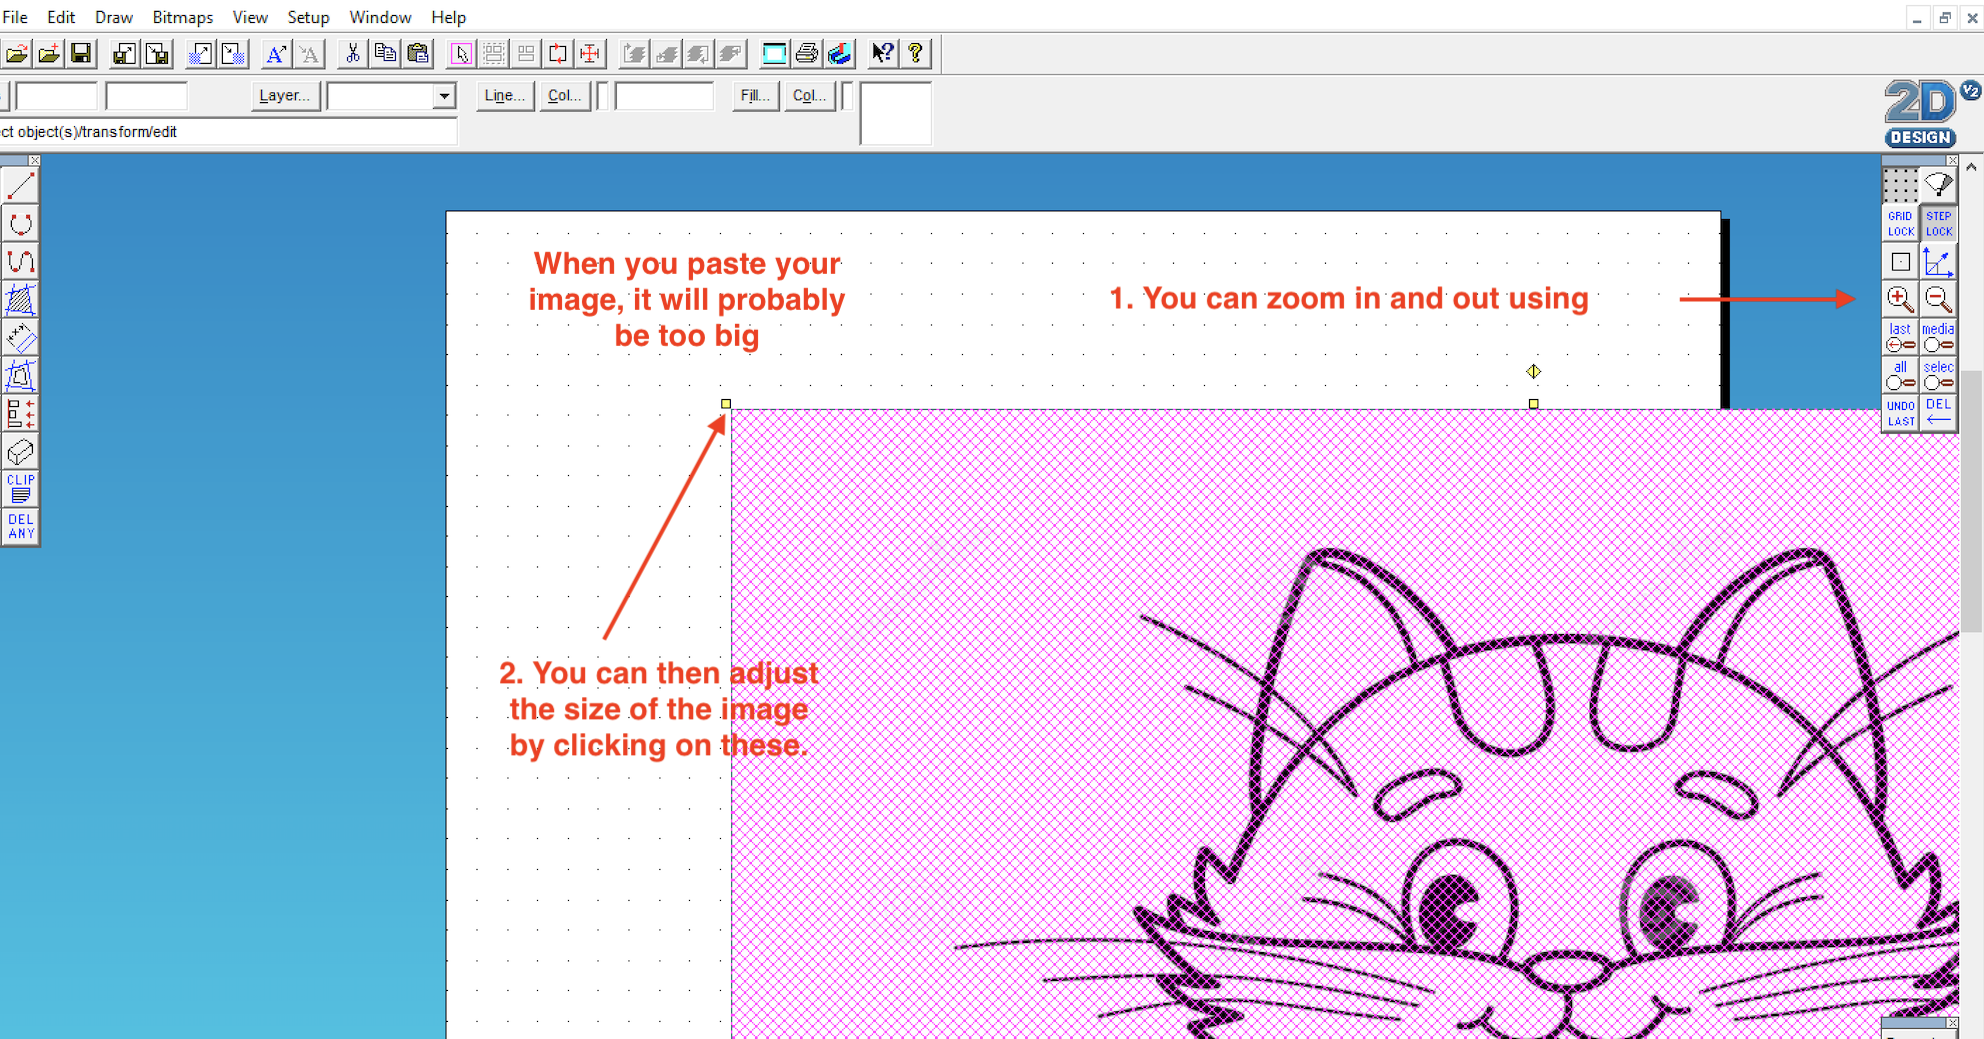
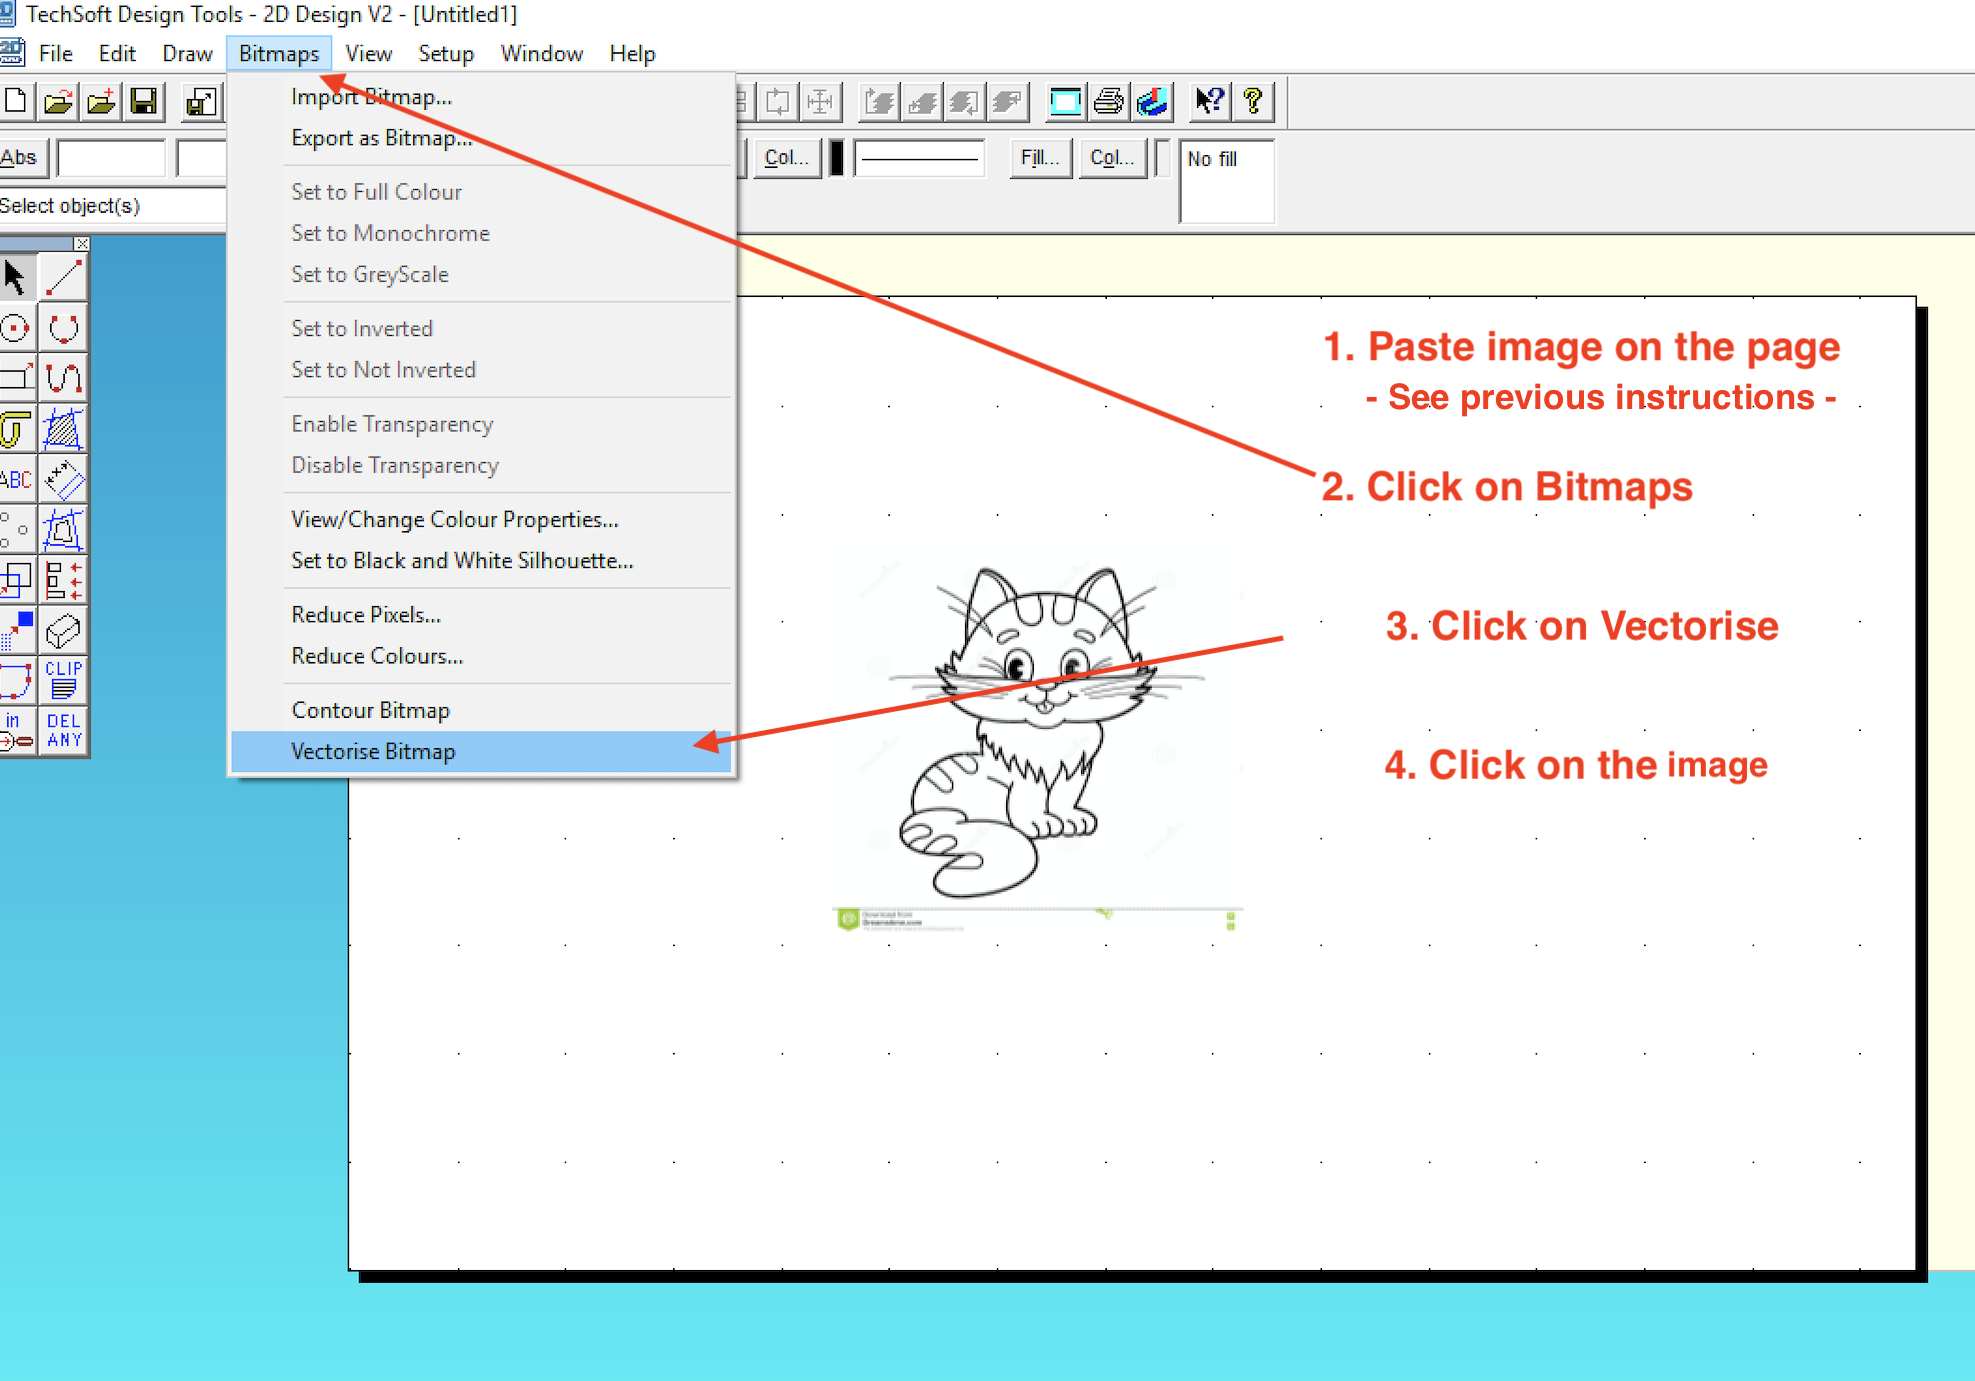
- Now paste your image onto the page. Right click on the mouse and select 'paste'.
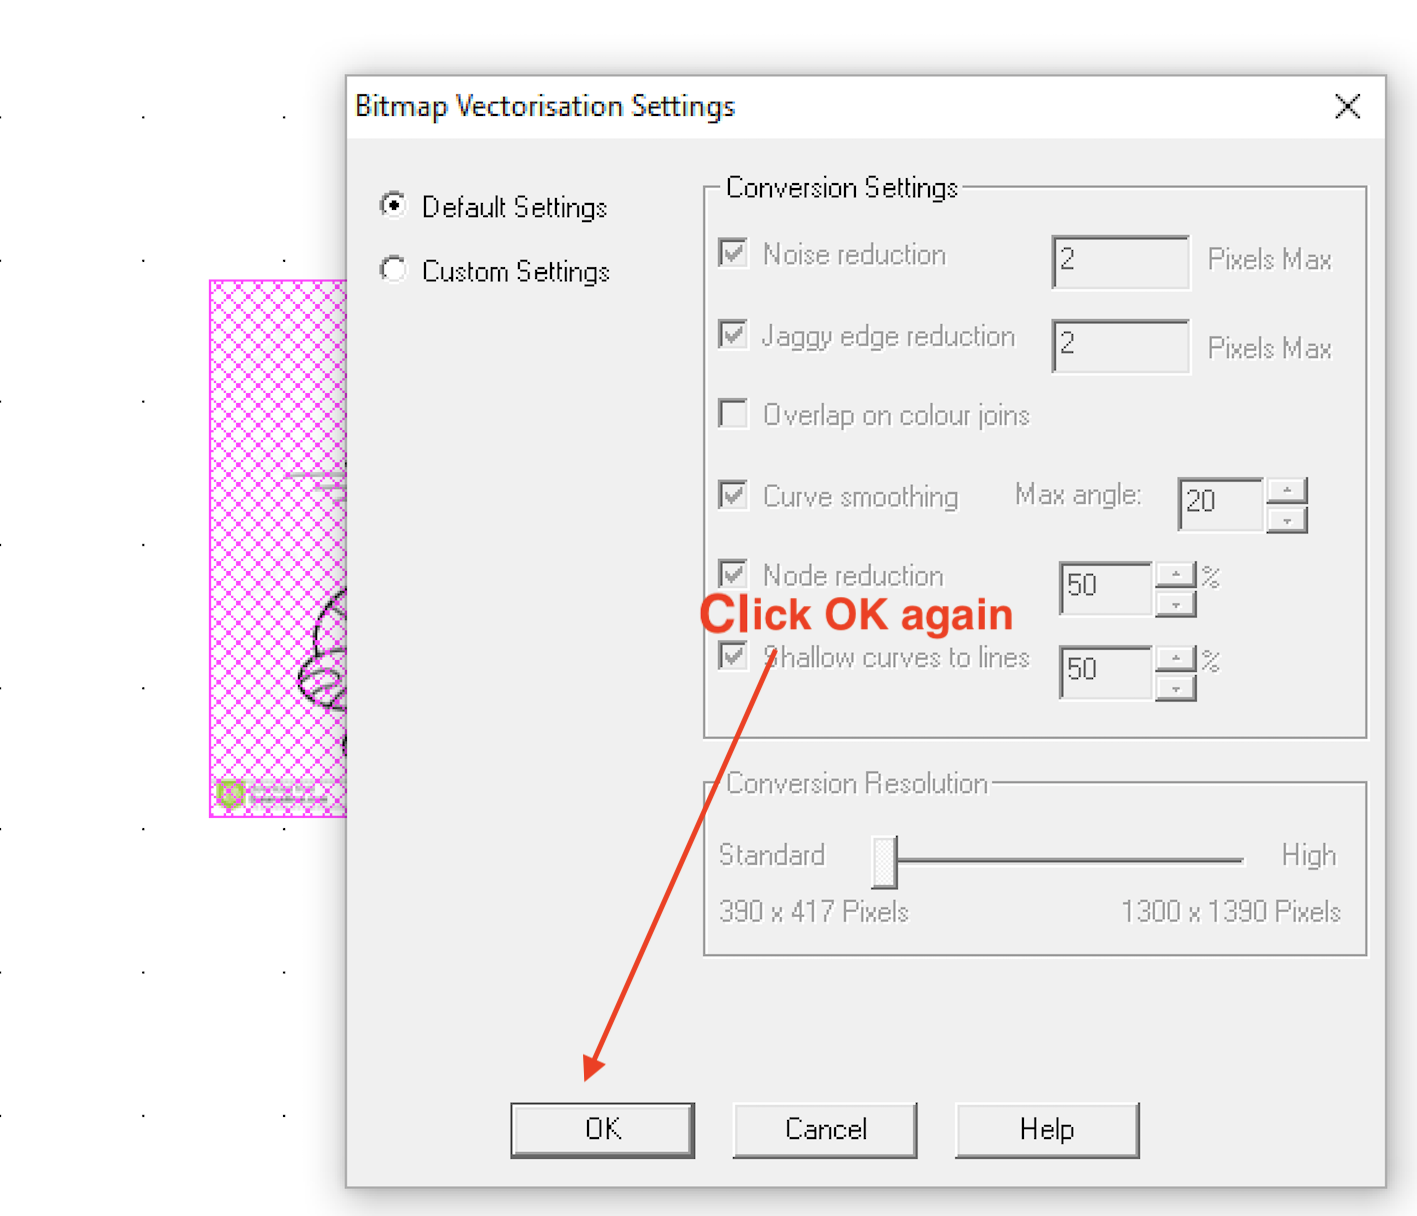
- You will now need to vectorise the bitmap.
- Select monochrome and then click OK.
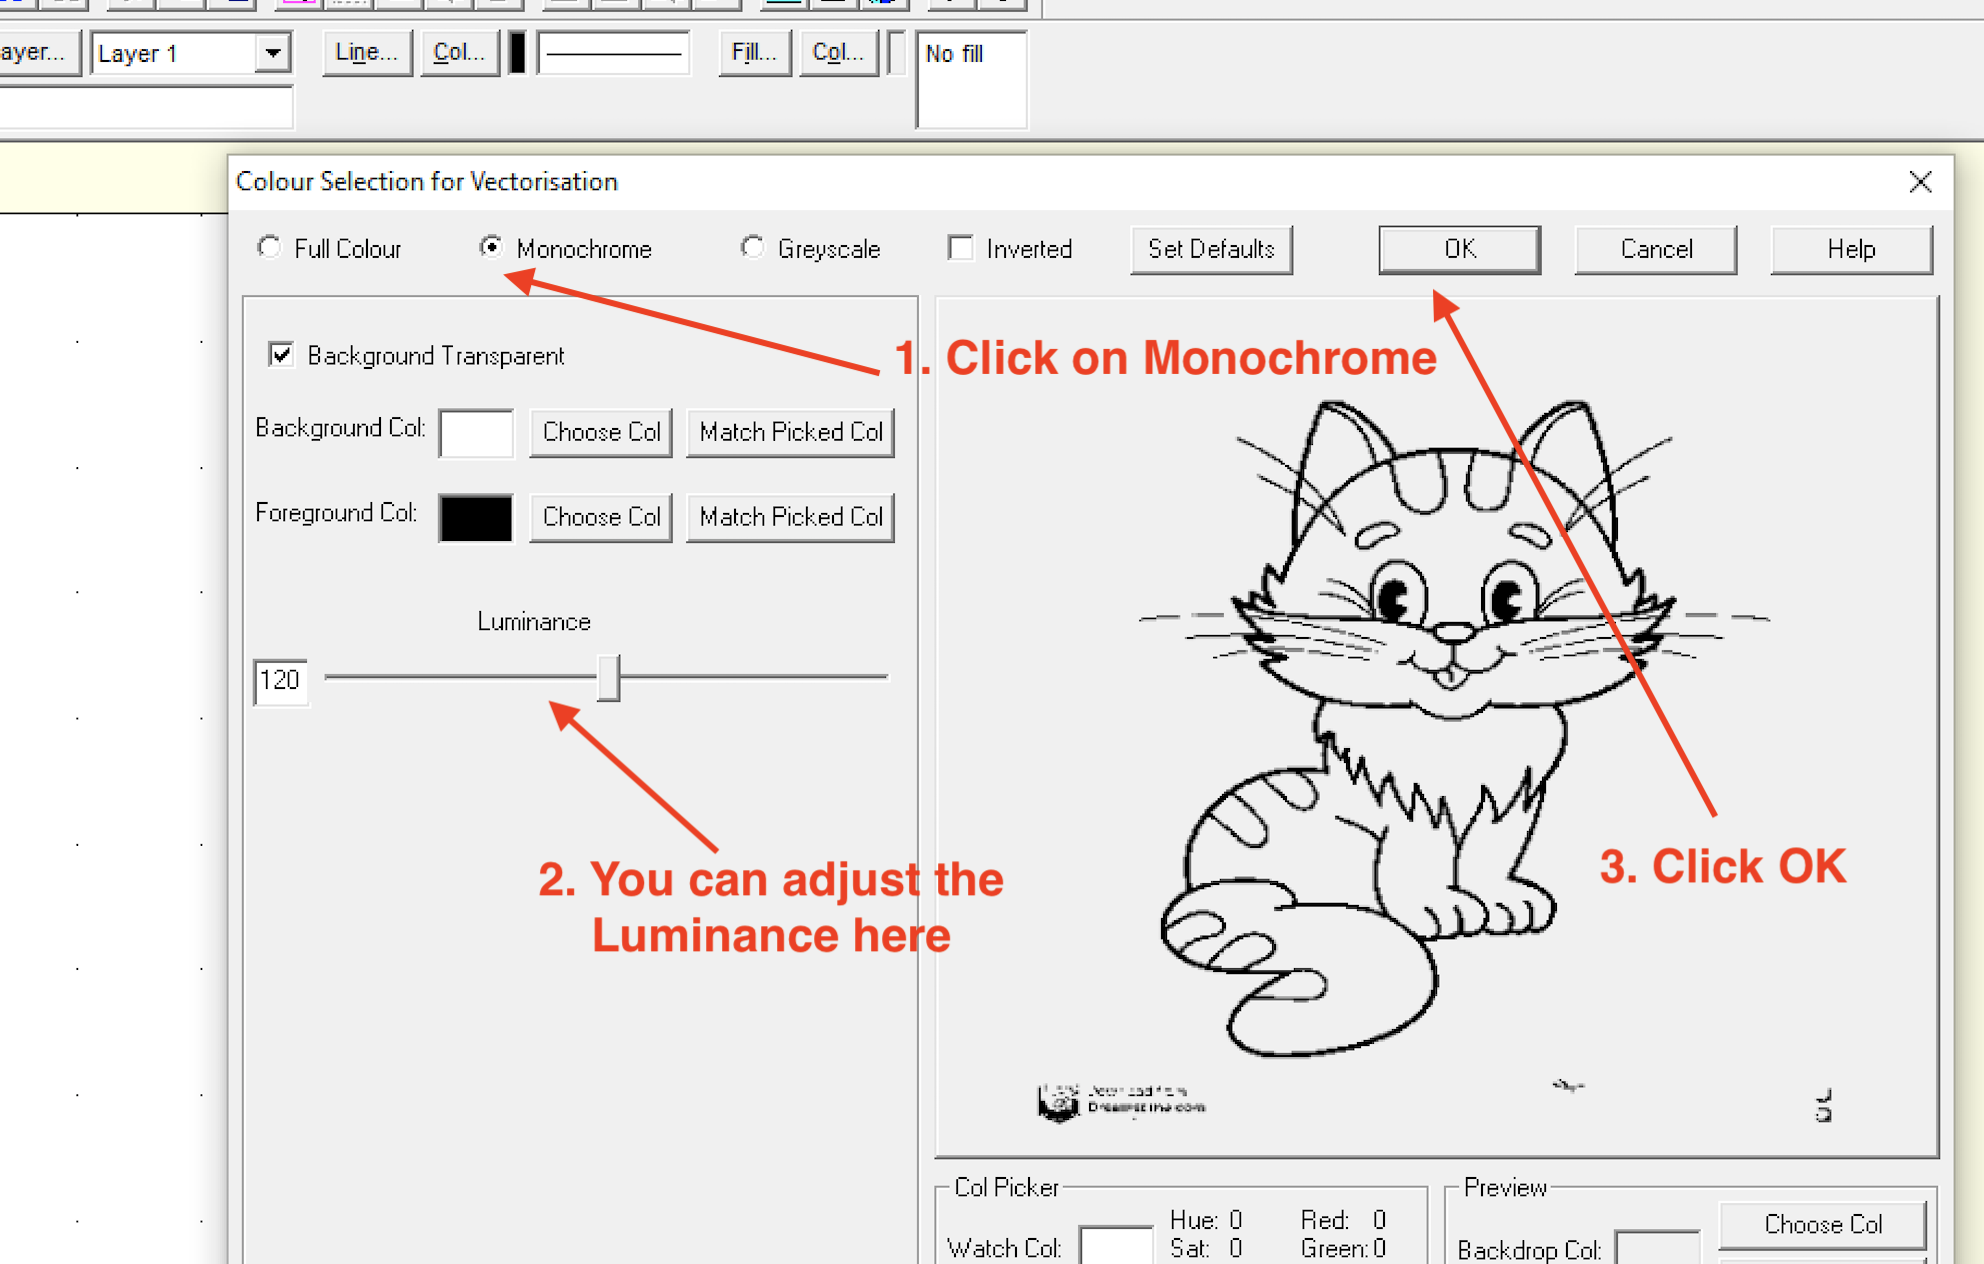
- Click OK again.
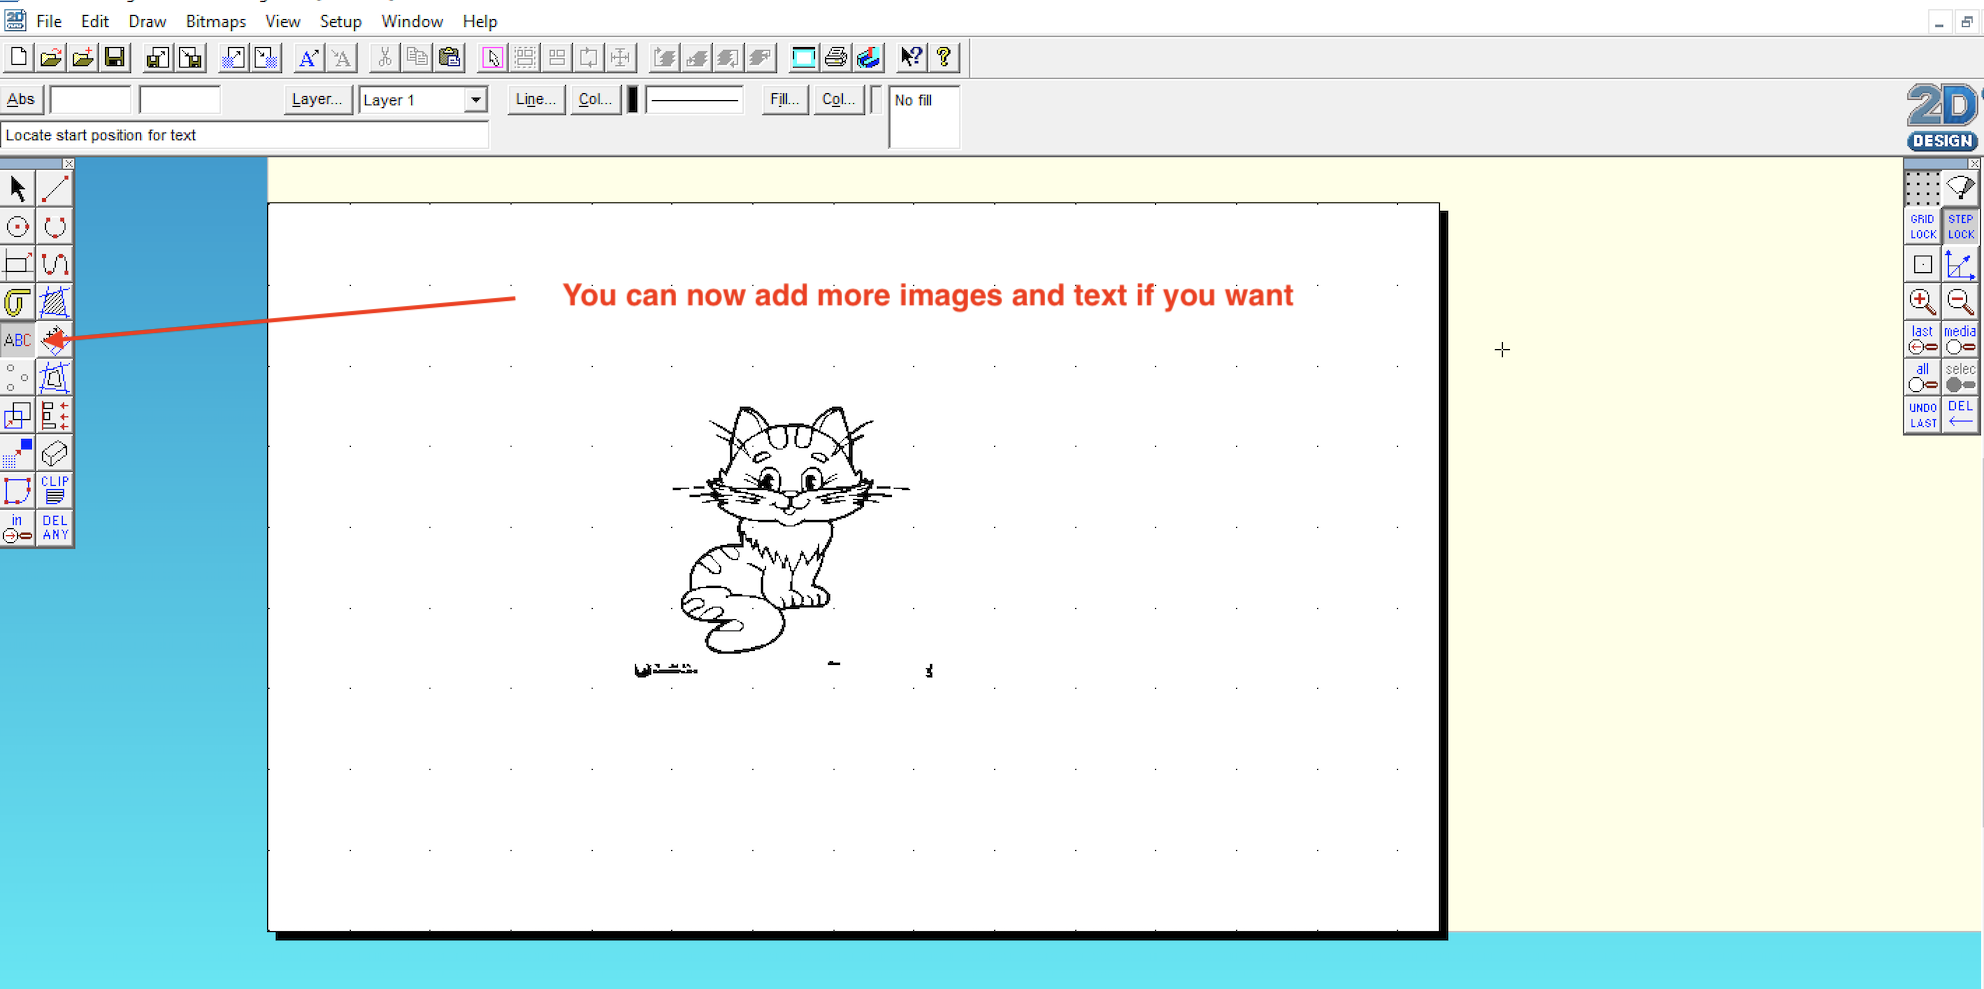
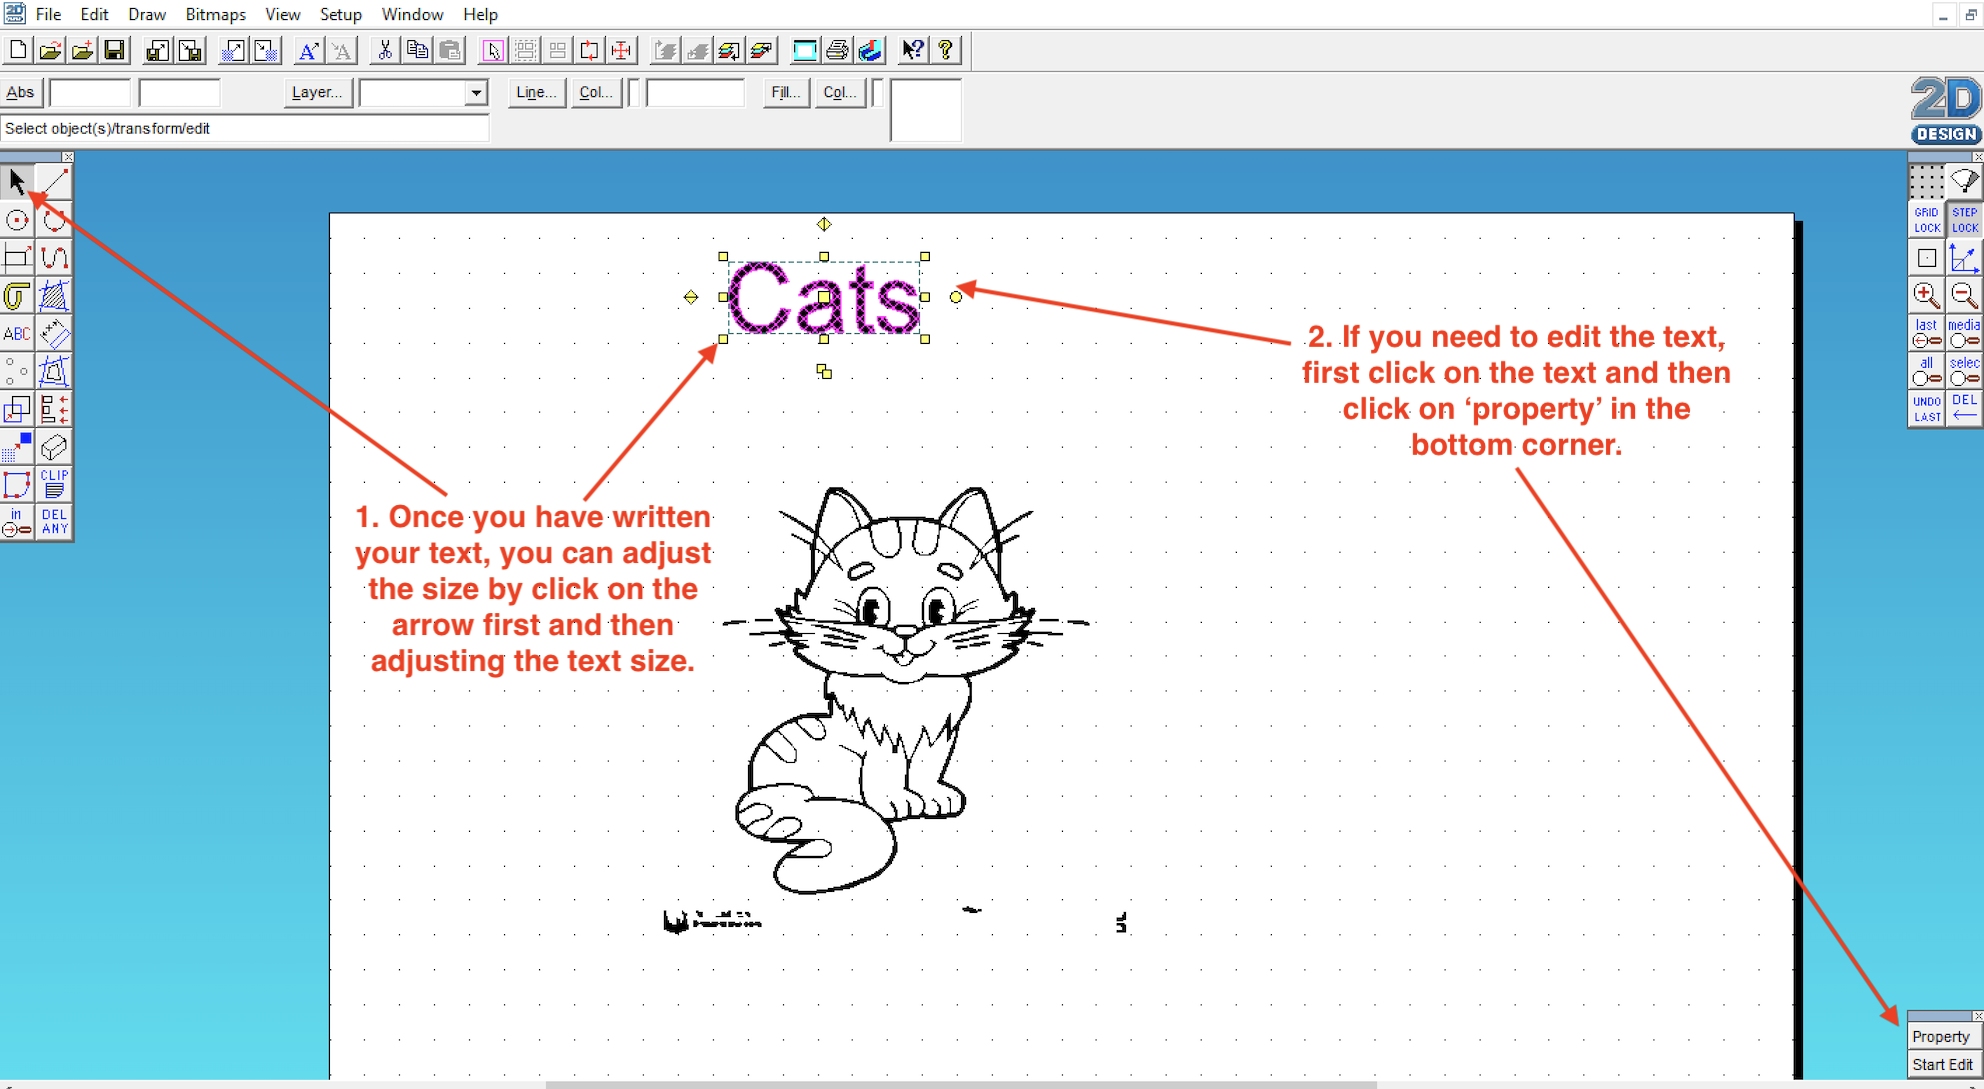
- You can now add text to your image.
- The text can then be adjusted to different sizes.
Please watch this video. It will explain how to use the laser cutter.